Intro
For the Character animation module, we were tasked with creating three animation sequences, roughly 10 seconds each. These sequences should be appropriate to the character we have already created in the previous character design module or alternatively we may choose a different character to animate for. Personally I really want to try creating an animation for the character I have already made however I think I might run into some problems along the way due to my model not being the most optimized in terms of clean topology and poly count, and due to my complete lack of experience animating.
Ideas and Research
I want to try creating an idle animation for my character, a walk/run cycle as well as some kind of attack sequence. To begin with I gathered some ideas for what I could base my animation off or use as reference for animating. Since my character uses a guandao as a weapon, a real type of polearm used in Chinese martial arts, I could look up and find videos of people performing with the weapon, such as those practicing the martial arts. As for the walk cycle, I plan to record a video of myself walking and use that as a reference to then animate from.
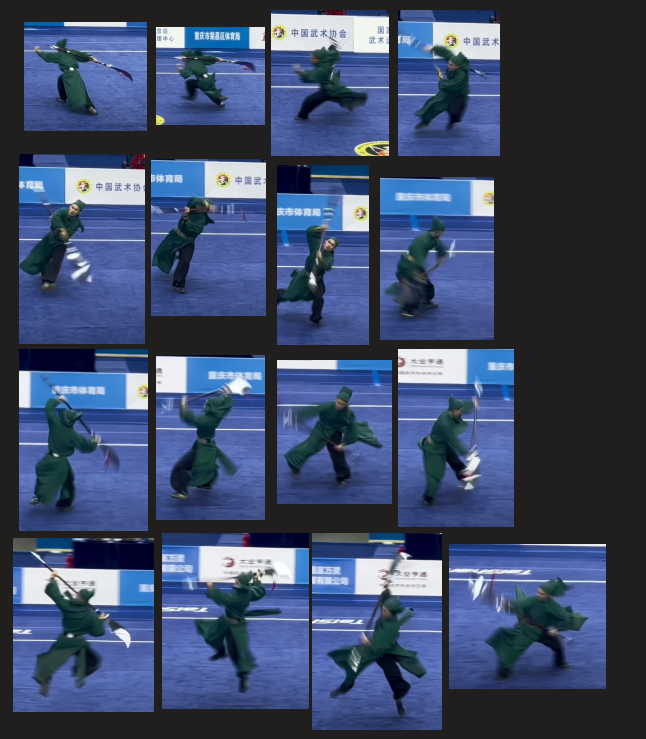
As I mentioned in the design blog posts for my character, I had initially imagined it as a MOBA or ARPG character. I had planned to include stabs, sweeps and maybe even a spin-attack in the sequence so I began looking at videos to find some martial art performances from which I could base my animation on. I came across a recording of the (2023) traditional Wushu Taolu national championships, where Pan Hongshen claimed second place in the guandao. This video included a lot of moves that I thought would fit my characters action sequence. In addition to this I looked into more guandao videos to learn more about the forms of combat.
For my walk cycle reference, I tried recording a video of myself to be able to cross reference it later on, however, to help me with the actual process of animating I saved a few videos such as Mark Masters’ (2024) video on creating walk cycles in Maya.
Building the rig
In order to animate my character, I would have to make a rig and bind it to the mesh of the character. This means I would have to build up a skeleton of bones, pivots and constraints. Following the canvas tutorial on rigging a character that we previously worked through during a workshop, I built up a hierarchy of bones and made sure to assign the correct nomenclature. This was particularly important to ease the process as it meant I could work on only half of the mesh and mirror it on the x axis to complete the skeleton.
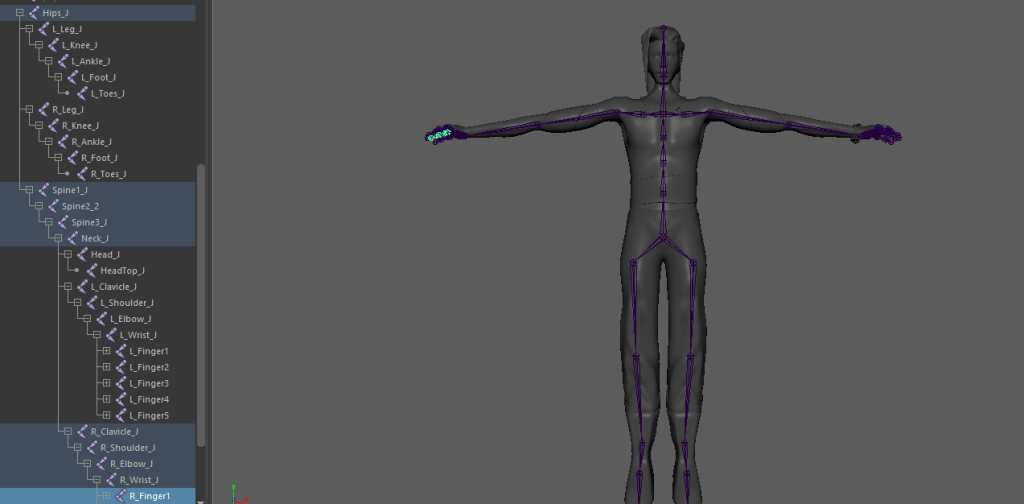
Next came the process of binding the mesh of the character to the skeleton I had created, this already let me manipulate the individual bones and somewhat control the character however it was very far from perfect in influence and very inefficient. To simplify the animation process, I created a series of IK (Inverse kinematic) and FK (forward kinematic) controllers. This let me have more control over the movement of my character, IK controls would offer me more precise movement whereas the FK control would let me achieve movements that in some cases would look more natural, this is due to the IK controls working from the position of the controller, whereas FK usually works from the root and its influence translates forward through the hierarchy, meaning very natural looking arcs can occur.
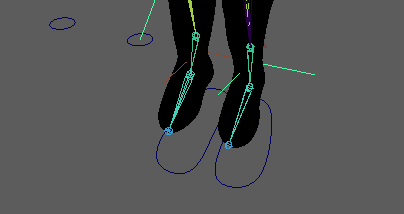
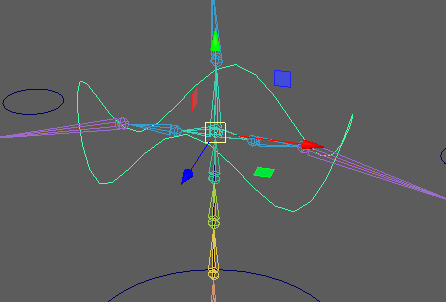
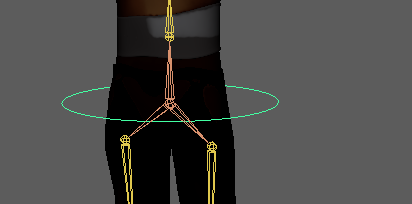
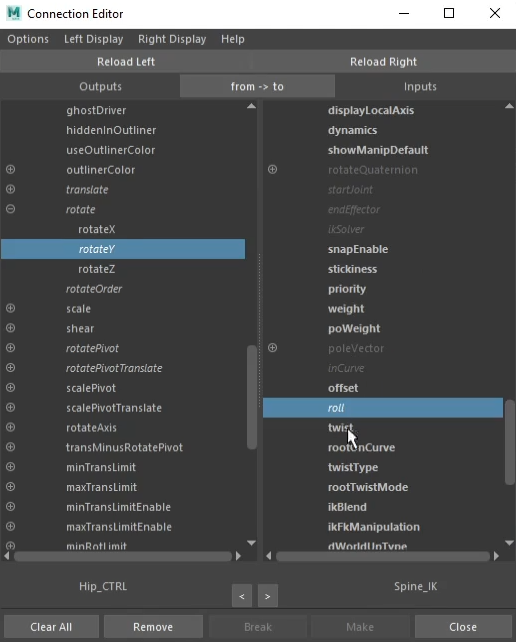
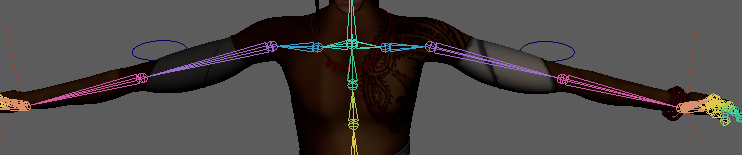
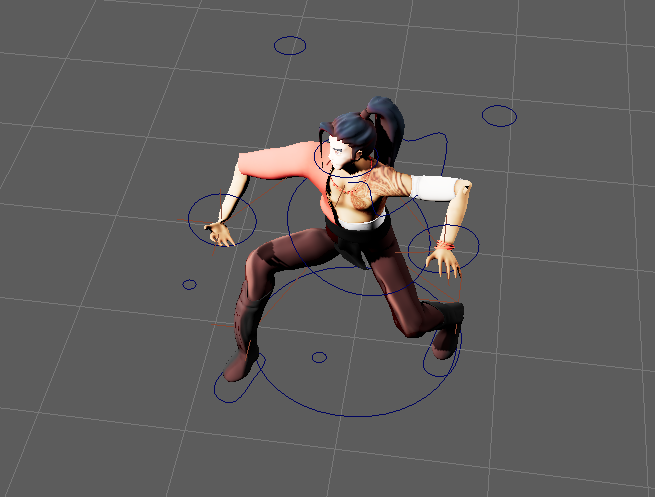
I set up IK controls for the legs, arms and spine of my character by adding simple curves around my model and constraining them to the IK handles. This let me manipulate the controls so that the corresponding body parts reached out to that position. In addition to these, I’d need to add additional controls in the form of pole vectors, these also acted to orient the midsections of the IK controls. After the IK controls, I set up a few more handles on my character for points that I would need to alter frequently during animating. This included a hip controller and a controller for the character’s chest and head. As for the previous handles, I also had to apply point and rotation constraints to these so that when i manipulated the controller, it would also have an effect on the related bones.
Weight painting
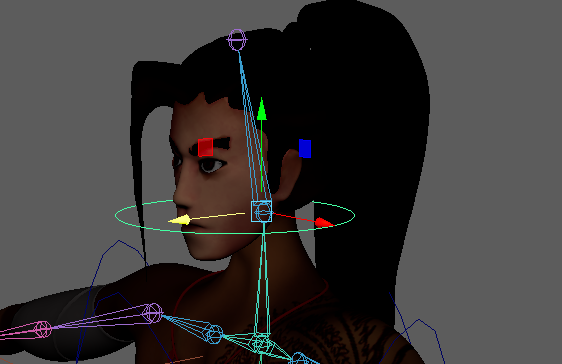
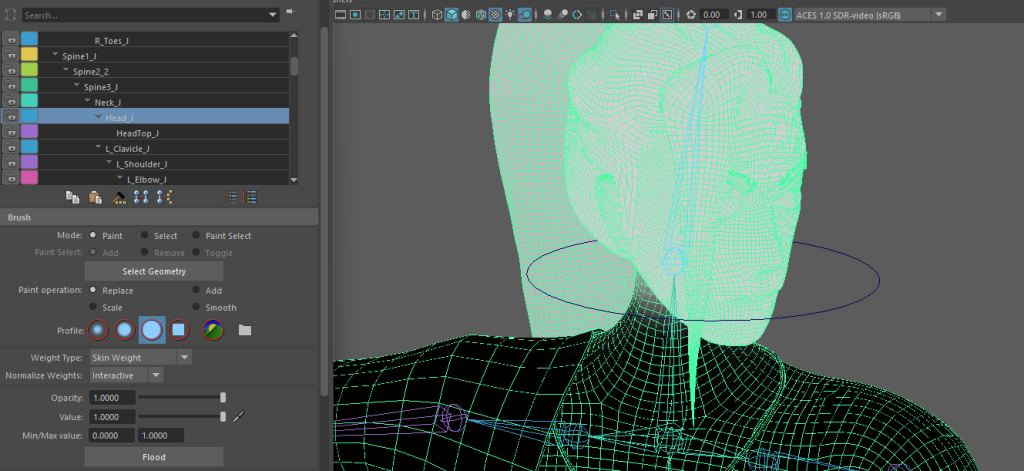
As I mentioned before, whilst I could manipulate the mesh of my character, the process was slow and imperfect. I had made it more efficient by adding the controls however I still needed to fix the influence that the bones had on the mesh, to make more natural and organic looking movement. For this I needed to paint weights onto the mesh to assign specific values of influence that I wanted each bone to have on the surrounding mesh. As an example of this, the head would distort heavily when rotated.
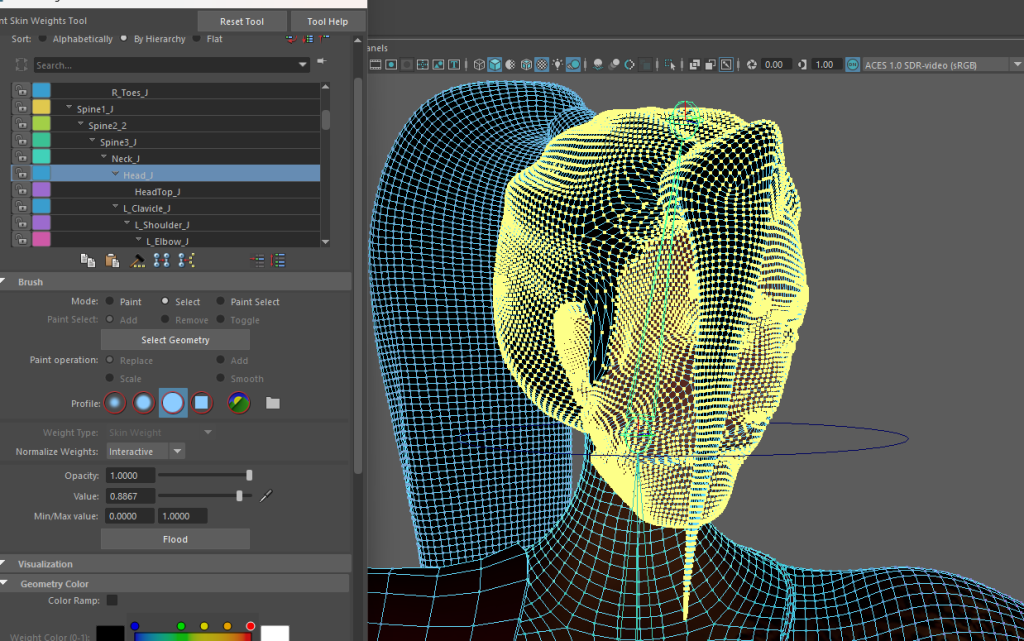
To fix this, I could select the whole head, select the head bone influence, and flood it with a value of 1, meaning that bone would have complete influence on the head.
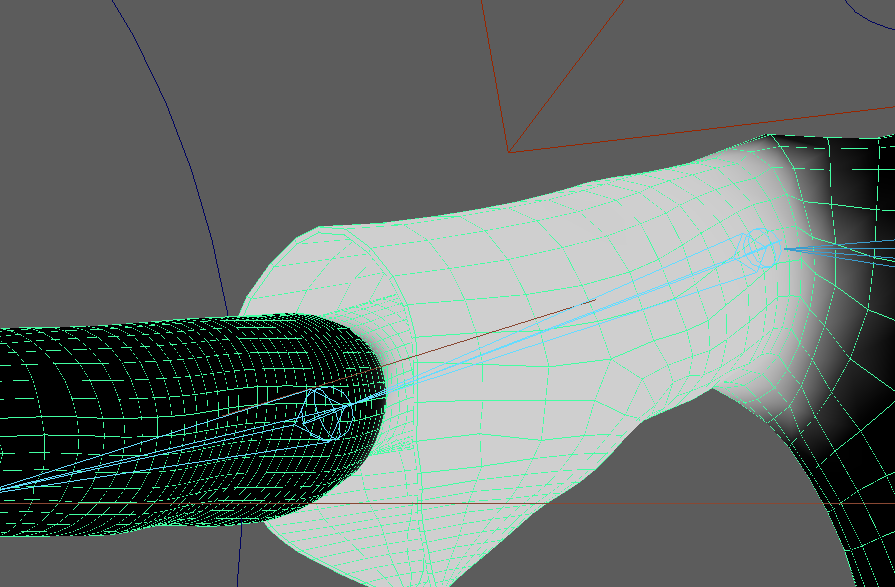
I continued to paint weights on different areas of the character’s body wherever I noticed weird stretching or distortion. This included areas around joints such as the elbows, knees and particularly the shoulders. The result of this was not perfect however I could not seem to get a result I was happy with, I think this was mostly due to my poor retopology during the design of the character model.
Animating
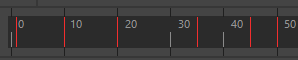
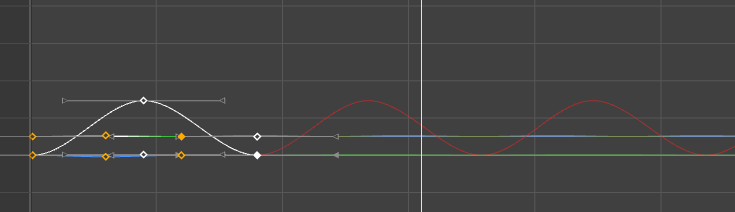
Now that my rig was finished, I could begin to animate. I started with the walk and run cycle as I thought that it would be the best one to help me familiarize myself with animating inside Maya. I began by trying to block out the first contact pose of my walk, meaning the frame at which both the feet were in contact with the ground. I could then mirror this pose by swapping the coordinate values of the feet to get the second contact pose of the walk cycle. After this I blocked out the keyframe in the middle of the two contact frames, or the pass position. After making a few additional tweaks to the rotation and position of the feet, I opened the graph editor which made it easy to duplicate the animation I made to this point and repeat it a few times.
Although I had a reference for my walk, I still found Mark Masters’ (2024) walk cycle video incredibly useful as it gave me more context and helped with the workflow of animating the cycle. I moved onto animating other parts of the body to make the movement of the character more realistic, I tried to follow my reference as closely as possible. I wanted to reflect my character’s personality and backstory in the walk if I could, so I specifically raised the chest and tilted the head back to give the feeling of confidence in his walk, to hint at the character being an important figure. I made a quick model of a guandao for the character to hold as he walked, as I felt that was also an important part of the character’s design and added to the overall composition.
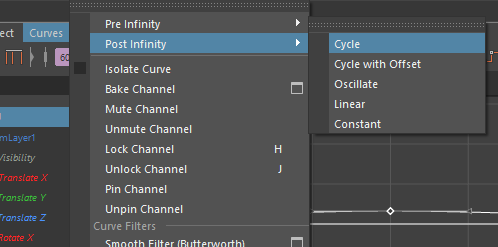
After coming across Sir Wade Neistadt’s (2020) video on animation workflows in Maya, I took inspiration and created a separate layer in my animation to help me create overlapping or secondary actions. On the new layer, I created another cycle but this time moving and expanding the chest, as well as moving the arms and head slightly, this being on another layer made it easy to loop with the graph editor independent of the other keyframes.
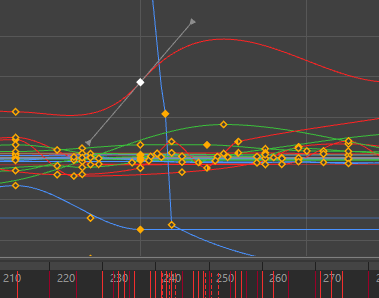
Next I wanted to tackle the Idle animation of my character. I had already planned out what I wanted to animate so again I began by blocking out the most important frames and working pose to pose. The character would bring his glaive up and inspect it from either side, after which he would throw it up in the air and catch it, easing out back into a resting position. I wanted to try and emphasize and display most of the principles of animation in this sequence despite it being a rather simple one. I tried to incorporate anticipation frames before the character throws his glaive up, as well as easing in and out of that motion. I did this by first blocking out the still frames then tweaking the timings by moving them closer or further away from each other on the timeline as well as by tweaking the shapes of the curves on the graph editor. I also tried to make sure that any motion I had in the sequence was kept in an arc shape, to help make it feel natural, again I mostly did this by either using the FK controls or by adding an additional frame and offsetting the position slightly.
My third sequence I worked on was the attack animation, which I struggled with the most. I tried to break down the video reference into key poses that I could then begin to block out however when I went back in to try model the breakdown poses or any frames in-between, I really struggled to get realistic and fluid looking motion. In the end I had to compromise and slightly simplify my initial idea which resulted in the current sequence of a kick, slash, stab, spin into two more stabs. My main problem with this scene came with the timing and pacing aspect as well as a few issues I ran into with non uniform scaling and object deformation due to the way I had a few of my controls parented in a hierarchy. To fix the scaling and weird deformations I had to animate sequentially outward from the root of the hierarchy, as if I tried to animate the child first, any changes I would animate in the parent would amplify the displaced values on the child.
Rendering
When it came to the rendering of the sequences, I used the same setup for all 3 animations. I used a three point lighting set up and placed the character in front of a white backdrop which I made from a scaled up sphere with its normals inverted. I would have liked to make even a simple environment to place the character in as I feel like it would have added a lot to the sequence however I was already running low on time, and I was not sure if I could get done otherwise. I ran into many issues with the viper render farm and still wasn’t able to use it in the end, so I had to render the sequences on my own pc.
Walk cycle:
Idle animation:
Attack sequence:
YouTube:
Reflection
Overall, I am not too satisfied with the result of this module, and I feel like if I tried again just with the experience I gained from this assignment I could achieve a much better result. I feel like a lot of the movements I ended up with look and feel very unnatural and awkward and most of my sequences could have used some more exaggerated movements. I believe a lot of that is to do with the timing, which was a huge weakness for me in this project. To fix this in the future ill be sure to adhere more closely to any references I have and ill spend more time on the block outs to make sure I have the pacing down before moving onto the finer details of animation. In addition to this I do believe that my animation does not look too great partly due to the state of the character model. In hindsight I should have put more care into ensuring clean topology when designing the character so that I wouldn’t end up with weird proportions or mesh distortion when animating it. I should have tried to spend some time prior to animation to clean up the model and retopologies it to make the animation process a lot easier and simpler. I am eager to keep learning animating and I’ll try working on it on my own outside of uni modules.
References
Sir Wade Neistadt (2020) The Secret Animation Workflow You Should Be Using Available online: https://www.youtube.com/watch?v=7dAzk2oeQoA [Accessed 7/3/24]