For this module we were assigned the task of creating a short VFX sequence for one of the following:
- A TV commercial
- A video game cutscene, opening, intro or other action sequence.
- The opening or ending of a Film or TV Show
- A particular sequence in a Film or TV Show
- A Music Video
- Or other sequence agreed with the Module Co-ordinator
Out of the options presented I was most inclined to work on a video game cutscene, in particular I wanted to try making the into for a game idea I had, for which I would also be making a level for Level Design. This project would be my first time animating a (relatively) longer sequence and my first time trying out animating in unreal engine.
Concept and Planning
Since I had a decent idea of what I wanted to do for this project I began drawing out a story board as well as a potential floor plan for the room my sequence was going to take place in.
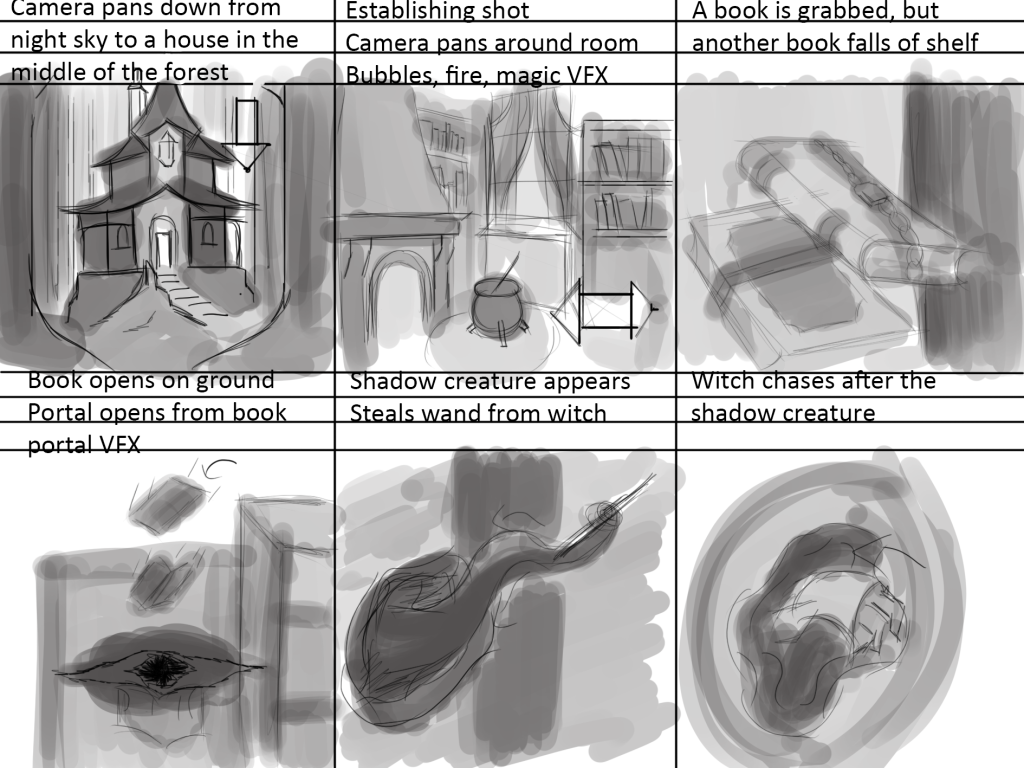
The Sequence would begin looking up at a starry night sky, the camera would then pan down to reveal a lone hut in the middle of a forest, the view shifts to inside the house where we see the witch. The camera would pan around the room to show the different VFX implementations, mostly as the witch’s magic. A book gets knocked off a shelf and opens on the floor, opening a dark portal, a shadow creature would crawl or extend some arm out of the portal and steal the witch’s wand. As the creature retreats through the portal the magic around the room would disappear, the witch would jump into the portal in pursuit of the wand thief.
I intend on the art style of both the assets used, whether I end up making my own or sourcing some from the marketplace, and the VFX I plan on creating, to be more stylized than realistic. Not only does this fit the idea I have of the game better but I feel like it would also be advantageous from a movie making perspective as I could afford to make the sequence a bit more animated and cartoony.
Visual Effects + Test Scene
I created a list of all the visual effects I wanted to include in my animation:
- Fire
-I need to create a stylized fire effect for my scene, I will put this inside the fireplace. - Smoke
-In addition to fire I’ll also need to create some smoke - Portal
I need to create some kind of portal for the shadow creature to reach out from - Bubbles
– Some bubbles for the witch’s cauldron - Magic
– A few different types of effects to show magic is being used, small flickering particles and magic circles etc.
To begin with I wanted to create some kind of simple particle system for magic, this could be a visual indicator of magic properties of materials around the witch’s house. To do this I made a fountain emitter Niagara particle system in which I lowered the gravity and initial velocity of the particles, I added a colour scale to taper off the opacity over time. I then made different variations of this effect by tweaking the colour, emitter size and spawn rate.

I needed some kind of portal effect for my animation, this would appear near the end of my sequence, the shadow creature will extend out of this portal and steal the wand away from the witch.
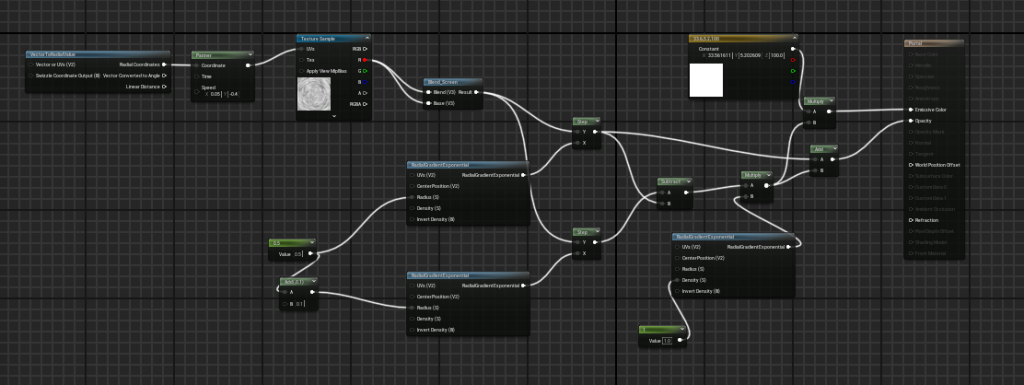
I recreated a portal effect I saw on a Youtube video by Alex Huang (2023) where he used a noise texture and the panner node in combination with radial exponents and coordinates to create a rotating expanding effect.
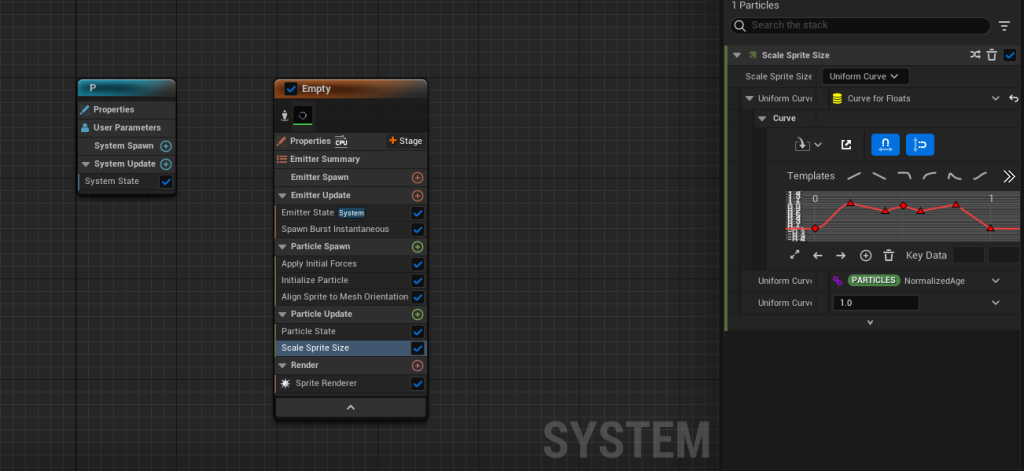
I then turned the texture into a simple sprite burst Niagara particle system where I created a pulsing effect by scaling the size of the sprite over time.
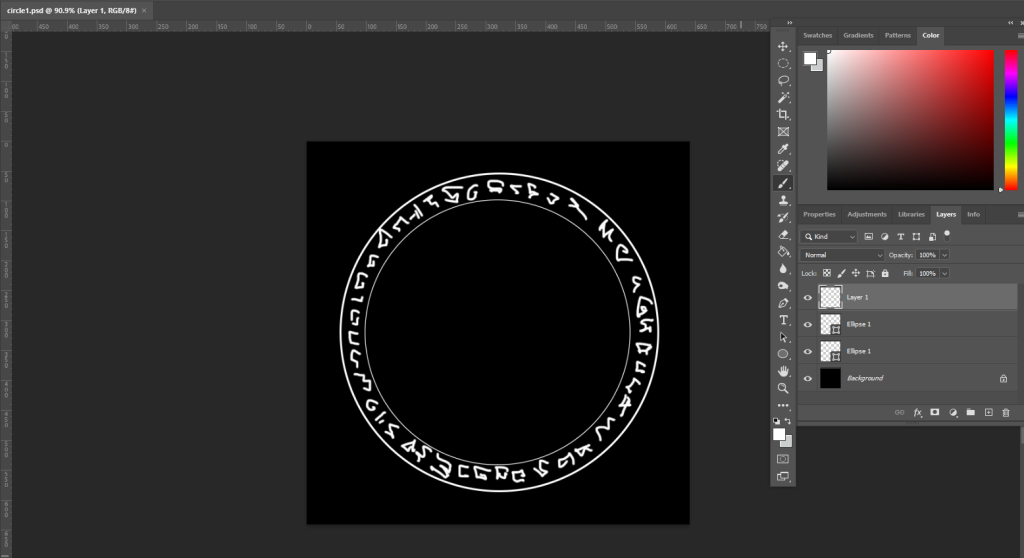
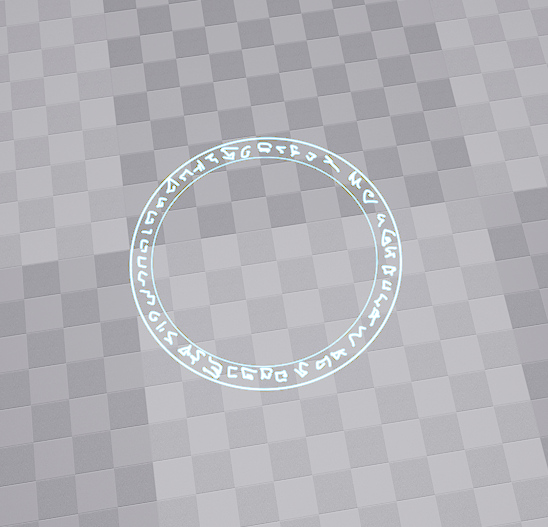
Another effect I really wanted to have in my level was some sort of magic or runic circle, these are really common in a lot of media like anime or rpg type games and exist primarily to support a magic system, whether that be by being catalysts for said magic system, purely visual representations, or the entire basis behind a given system.
I drew a quick design of a rune circle in photoshop, I could have made the design more interesting but I was planning on putting these around objects that were under a magical influence and I didn’t want too much visual clutter.
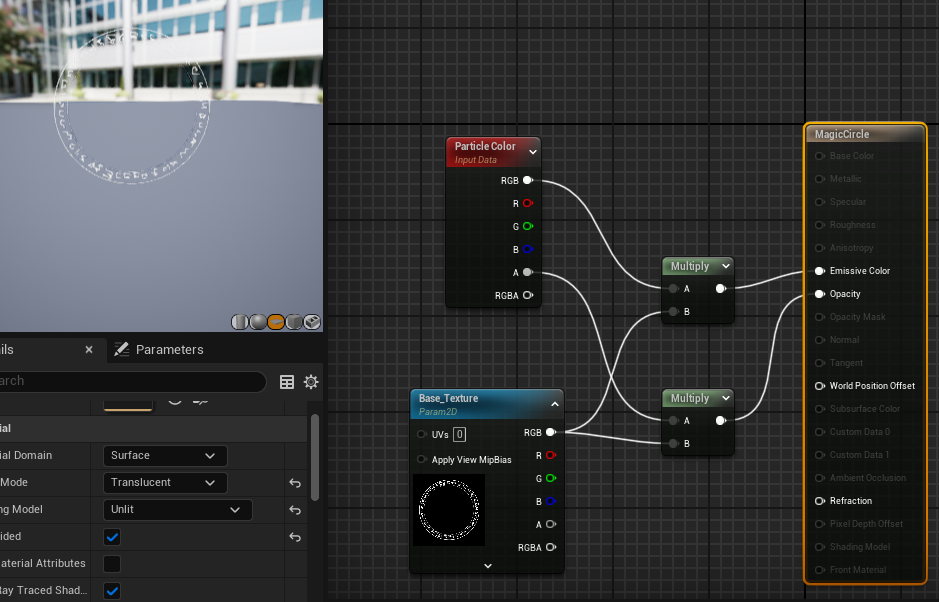
As for turning my texture into a material I could use, I had to set the blending mode to translucent and the shading model to unlit. Across a lot of vfx videos I watched this seemed to be the most common setting for materials. I could then create a Niagara system to give the sprite a rotation rate.
For the fire I didn’t have to deviate too much from the fire tutorial on canvas, however I wanted a different texture so I downloaded a 2×2 subUV texture from Ralph Jean (2023).

Finally, I created some bubbles for the cauldron. To do this I duplicated my fire particle system and changed a few variables, I made the emitter radius larger, decreased the velocity of the particles and shifted the colour to a desaturated blue.
Sourcing Assets and Arranging the Scene
Now that I had all my visual effects ready I could start building the scene for my sequence. Whilst I was initially planning on making the majority of the assets myself like I did for level design, I fell quite ill while working on this project, so to save time I decided to mostly use market place assets and only self model things like the magic wand.
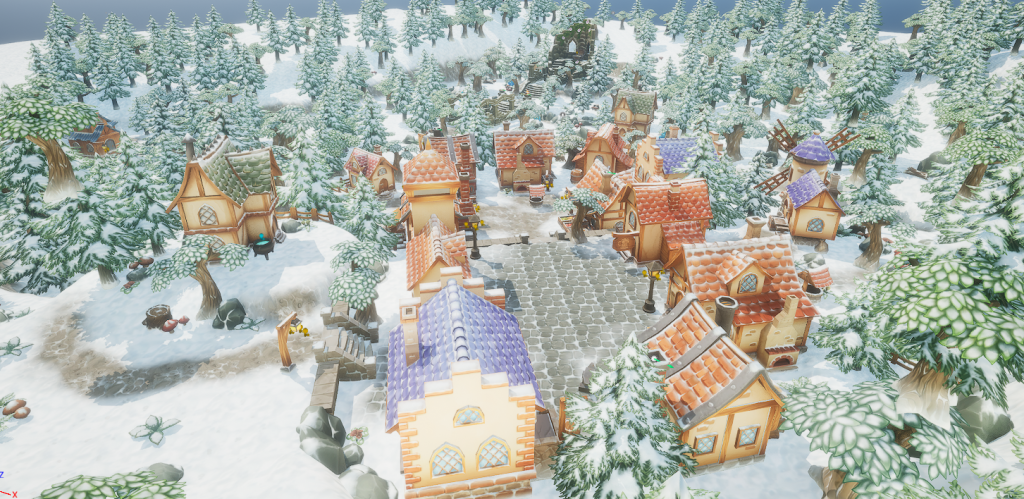
I needed an exterior area as well as an interior where most of the sequence would take place. For the exterior I used the HandPaintedEnvironment asset pack and placed one of the houses on a small hill with steps leading up to it, surrounded by a forest. I also imported a legacy skybox from engine content in unreal, I replaced the existing skybox with this one so that I could make it night with a starry sky.

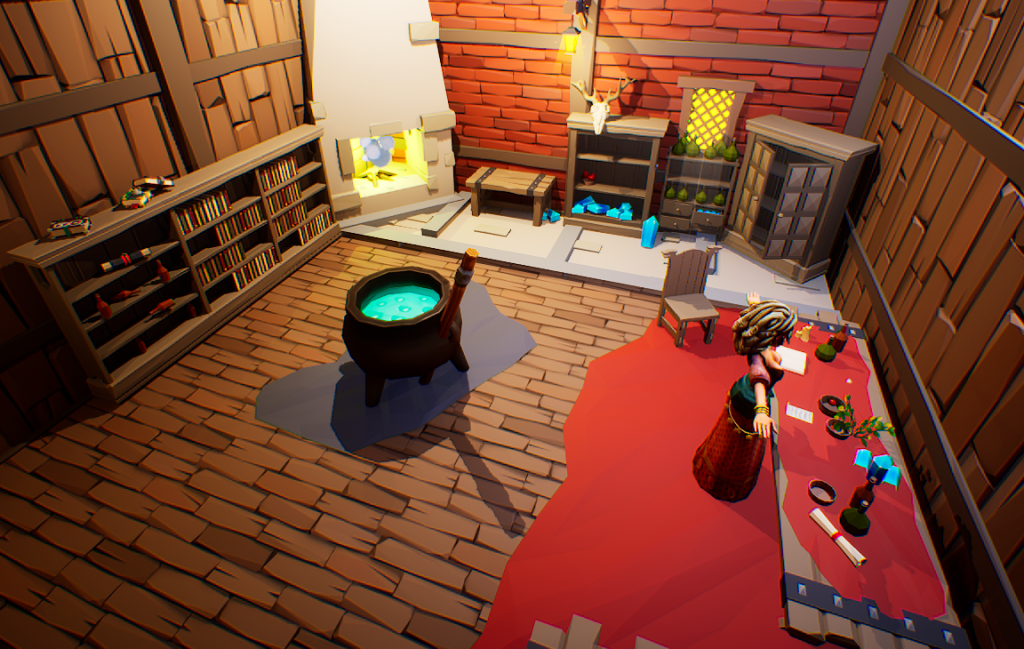
For the Interior I used an asset pack I got for free last year, the Low Poly Viking World pack. This contained plenty of modular assets and set pieces to allow me to create a interior room for my sequence. I began building up the interior of the witch’s house. I wanted to fill up the empty wall space as much as I could without making it feel too cluttered. I populated the bookshelves, cabinet, and table with various different magical-looking objects as well as things that could pass for potion ingredients. I put the cauldron in the centre of the room to break up the space a little bit.
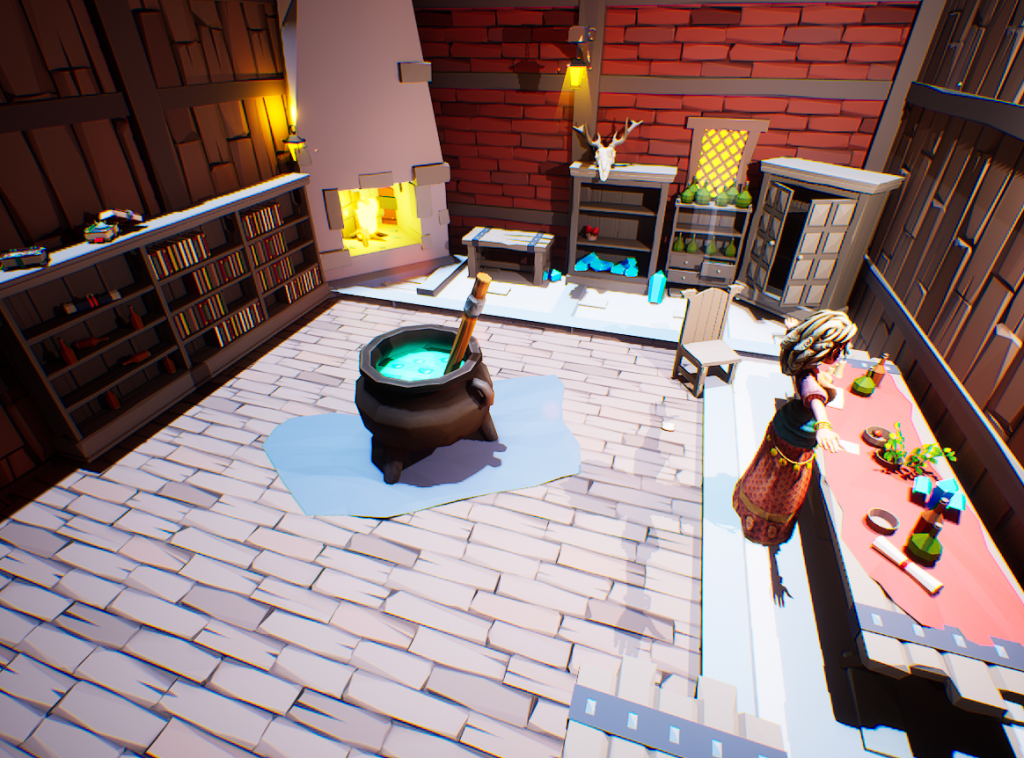
After assembling the room I tweaked the lighting to make it more atmospheric, I enabled temperature in the light settings and set it to a warm colour to give the illusion that the fireplace was providing the majority of the light in the scene.
I imported a character from Mixamo to use within my project, I was hoping that along with the animations on Mixamo I could also set up an inverse kinematic rig for the character to make it easier to animate, whilst I do have experience setting up basic IK rigs for 3D models, I have not yet done it inside unreal engine and despite watching tutorials and following unreal documentation I could not get the IK to work like I wanted it to. I must have been doing something wrong but I couldn’t pinpoint what mistake I was making and figured it would probably take me too long to figure out.
Animation
Now that I had the scene put together I could move onto animating. I started by creating individual level sequences for different things I wouldn’t want to vary the animation for. For example I created a level sequence in which I animated a loop of the cauldron being stirred.

I also created a loop for a book and a few pages that would be hovering around in front of the witch, I intended on making it look like the witch was preparing some kind of potion or spell whilst reading through her notes.

The last loop I made was a very simple short looping animation for the witch herself, I then created a master level sequence to which I could add the other sequences I had just created.

In this master sequence I tracked everything else I needed to animate that wasn’t already being looped. It was here that I made the mistake of mixing up sub sequences, Mixamo animations and rig keying, I didn’t realise until quite far into animating that including different types of animating for the same object would cause a few issues like inconsistent character placement, a loss of control due to hierarchal bias and priority.
Setting up the main sequence was by far the most time consuming part of this project, making sure the animations lined up, trying to make the hand animated character movements as fluid as I could manage and fixing every issue I ran into.
I integrated the visual effects into my sequence with the use of the Niagara component tracking inside the level sequence, This allowed me to directly modify and change variables of the VFX from inside the level sequence, I used this to activate the portal at a certain point in time and hide the rune circles after the wand is stolen.
Camera mapping
After setting up the animations in the scene, I began working on the cameras for the sequence. I wanted to include a establishing shot of the whole room, a panning camera to navigate around the edge of the room focusing on the assets and visual effects, one close-up camera for the book falling as well as a dynamic shot to capture the witch turning to look at the opening portal.
As for the opening scene, I added a camera and positioned it to start off looking at the sky, after a few seconds it would begin panning down and approaching the house.

Adding the cameras to the scene was quite simple, I just had to track the transform and any settings of the camera I wanted to change, just like animating I inserted a keyframe for every movement I wanted to track.

With all cameras in place I could now set each one up in camera cuts, to make sure each camera was capturing what it needed to at any time in the sequence. I used camera cuts rather than recording separate takes and stitching them together as it provides a more consistent result.
Editing and Rendering
In after effects I combined both the renders together and I added a simple fade from and to black at the very start and very end of the sequence. In addition to that I added a opacity gradient between the two scenes to make the transition between them less jarring. I then rendered the sequence.
Final Render
Youtube link:
Reflection
Overall I am satisfied with the finished render, I feel like I managed to implement a good amount of visual effects into the scene and I am happy with their quality, I had a lot of fun creating them and I will definitely be looking into producing some more advanced and higher quality visual effects in my own time. I feel like the overall composition also turned out rather well and for the most part I am really happy with how my sequence looks visually.
On the other hand I am a bit disappointed with the results from the animation perspective, not only am I fairly inexperienced in 3d animation in general but I still find the unreal engine UI to be rather unintuitive, this in combination with the problems I had with the rigs and character meshes meant that I wasn’t able to fully and fluidly realise the animations I wanted to include in the scene.
To improve on the project the animation element is the first I’d tackle, I need to spend a lot more time outside of Uni projects getting used to unreal through projects in my own time. As for the project itself, if I had more time I would have redone whole sections and elements as soon as I figured out a better way of doing them, due to the lack of time I was unable to do so this time.
There is a bit of a clash of styles between the two asset packs I used, this could be remedied by sticking to one asset pack or creating my own assets which is what I will try to do for future projects of this kind.
References
Yevheniia Yaremko (2015) HandPaintedEnvironment [Asset Pack] Available online : https://www.unrealengine.com/marketplace/en-US/product/hand-painted-environment?sessionInvalidated=true [Accessed 8/1/2024]
PolyArt3D (2018) Low Poly Viking World [Asset Pack] Available online : https://www.unrealengine.com/marketplace/en-US/item/0778929eb3084bf0867a5b474379b072 [Accessed 7/1/2024]
Alex Huang (2023) UE4 Niagara Magic Portal Effect 1 – Tutorial [Video] Available online: https://www.youtube.com/watch?v=gwHFSSEdTrk [Accessed 7/12/2023]
Ralph Jean (2023) Fire Tutorial! [Texture] Available online: https://ko-fi.com/s/8583048793 [Accessed 9/12/2023]
Adobe (2009) Mixamo Available online https://www.mixamo.com/#/ [Accessed 14/1/2024]