Initial Ideas and Concept Drafts
In this module our task was to create an original character concept and sculpt it into a full 3D character inside Zbrush. To begin with, rather than jumping straight into sculpting inside Zbrush, I started by laying out a few character ideas and spending a bit of time on fleshing out a visual description and backstory for each of them.
Concept 1
- Wrapped in robes adorned with leaves and vines, the guardian of the grove has bark-like armour and carries a staff crowned with a living branch. Their eyes gleam with the wisdom of centuries.
- Born under the ancient Elder-tree, they absorbed the life essence of the forest. As a guardian, they protect the balance between nature and civilization, using their druidic powers to ensure the longevity of the sacred groves.
Concept 2
- A nimble but fierce young battle dancer, draped in a long flowing cloth, who wields pyromancy with a fluid and artistic style, using their glaive as an extension of their body, and as a catalyst for their raging fire powers.
- Born as the last descendant in a lineage of powerful elemental warriors, they must travel the lands and protect the legacy of their family and hunt down those who wronged them.
Concept 3
- Clad in celestial armour that mirrors galaxies, the Astral Harbinger carries a staff with a miniature black hole at its tip. Their eyes glow with the intensity of a dying star.
- Touched by an otherworldly force during the collapse of their own galaxy, the Astral Harbinger embraced their new found role as a bringer of cosmic change, wielding destructive powers to maintain balance amidst the celestial turmoil.
Although I really like all of these concepts, I decided against choosing Concept 3 for now as I felt it would be too difficult for me to accurately portray such a complex character with my current lack of experience in sculpting. I will however definitely revisit this concept in my own time after this project, after hopefully getting more accustomed to the software.
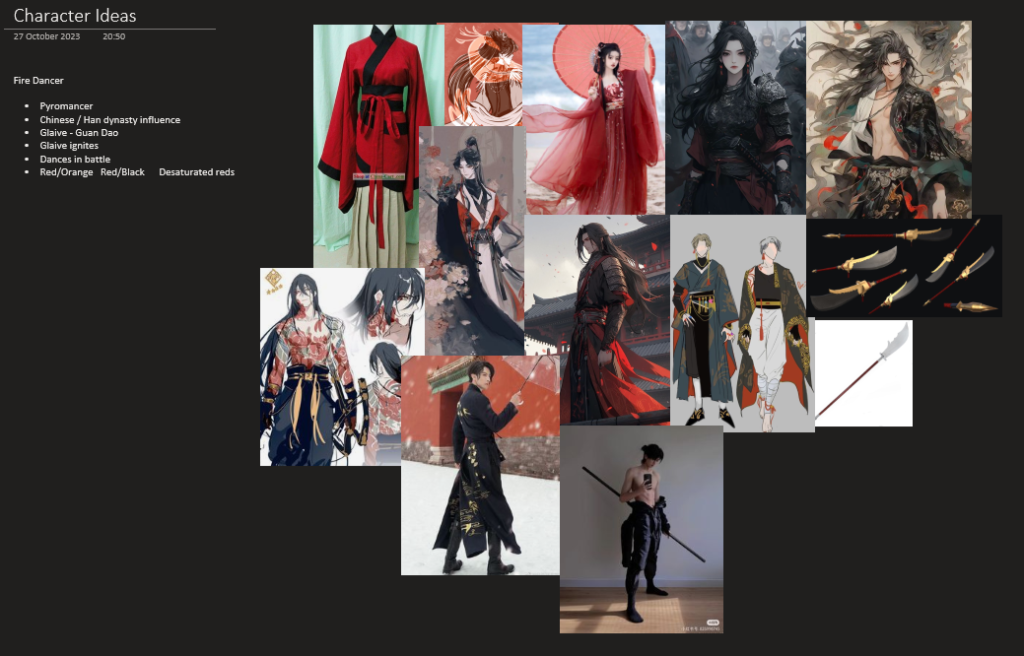
Between Concept 1 and 2 I chose to go with the second character as I was already forming a decent idea of what they could look like, I spent a bit of time gathering some images as a sort of mood board to further help me establish a direction I wanted to take the character in. I drew a lot of inspiration from eastern, wuxia fantasy when designing the body type of the character as well as their clothing.
I started experimenting with a few design ideas for the character in Photoshop, this sketch helped me map out some proportions but I wasn’t too happy with how the attire of the character ended up looking like.


I redrew the character with a few variations and was quite happy with how the idea was coming together at this point and I thought this was a good enough sketch to go off of in terms of showing the proportions, body type, hair and clothing of the character. I felt confident I could make a start on the modelling at this point.
I wanted the most prominent colour in the character’s design to be a warm and saturated red to reflect his fire powers as well as his brave, energetic and sometimes rash, impulsive personality. In addition to this I thought about giving him a tattoo on his chest to act as another visual representation of his powers, this would be a phoenix tattoo to tie the character back into eastern fantasy themes.
I intended on creating a more stylized character than something realistic, they could be a playable character in a MOBA or an ARPG as I think those genres would suit the character the best, because of this I drew inspiration from games like League of Legends (Riot Games, 2009) when coming up with the design. He would be an AOE attack-focused character and his back story could be easily implemented into his move set through dance-like moves like lunges, sweeps and slashes, there would be potential to include a lot of interesting VFX for the character too, like parts of his body igniting or fire coming out the end of his glaive as he performs his moves.
Progress Post (Practice/First Attempt)
I first worked on creating a block out following the canvas tutorials, I appended shapes on new sub tools and scaled them to the appropriate sizes. I then used the move tool (BMV) to change the individual shapes to better resemble body parts. This took quite some time as I was still inexperienced with the software but I eventually managed to get the whole body blocked out so I moved on.
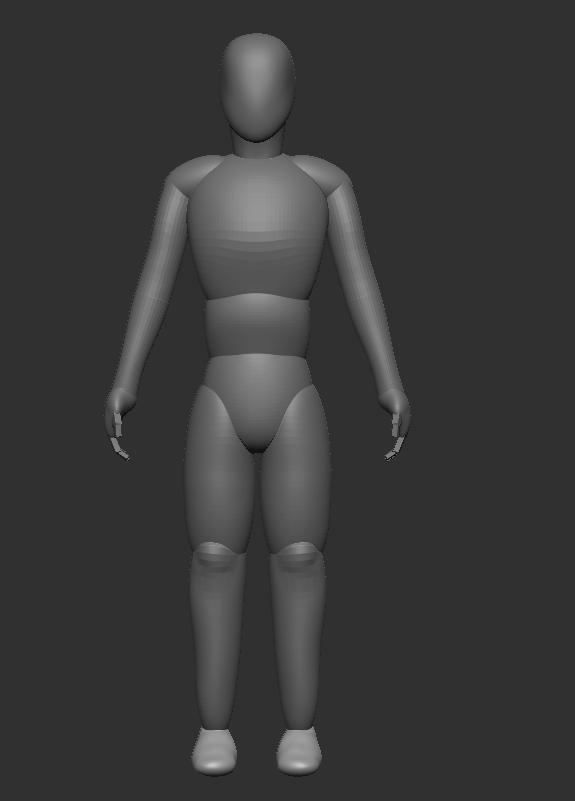
I used Dynamesh, a function of Zbrush, to combine all the different shapes into one and regenerate consistent topology, this was really useful as it meant I could easily turn my block-out into a base mesh for my character, I smoothed out the Dynameshed body with the smooth brush and started building a bit of detail to represent a human body shape along with the muscle groups.
Once I was done with the base body, I masked out parts of my mesh using a combination of the lasso mask and mask pen tools. I did this in order to be able to extract the masked areas as new sub tools, which would act as clothing for my character. I used the move brush to stretch the topology of the extracted shapes and used Dynamesh again when I saw the topology was starting to stretch and distort too much. I did the same technique of extracting and blocking out the hair for my character.
I tried sculpting in some folds on the cloth but I wasn’t too satisfied with how the clothes ended up looking I realised at this point that I did not remove the back-facing mesh on my extracted sub tools which meant that as I was sculpting I was sometimes affecting the back side of the mesh as well, which sometimes resulted in weird topology.
Whilst still uncomplete, this was the result of my first attempt at creating the character, in this attempt I tried out different ways of blocking out and modelling within Zbrush but by this point I was unsatisfied with many things like the proportions and shapes I currently had, I was still quite unfamiliar with the software but I was beginning to build my confidence in it and I thought I could do much better, so I decided to start over but this time with a more organised approach and cleaner workflow.
Block-out
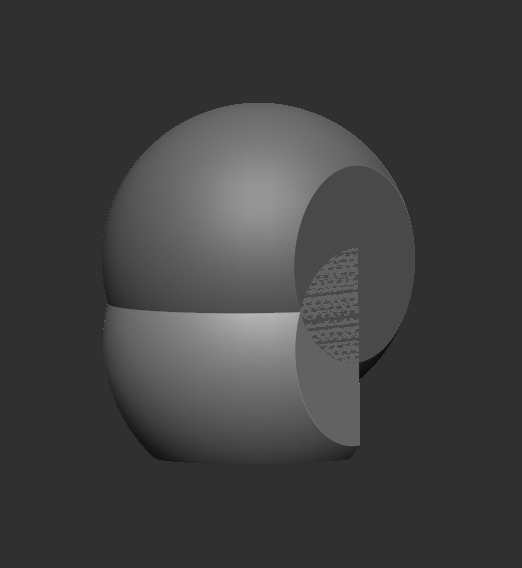
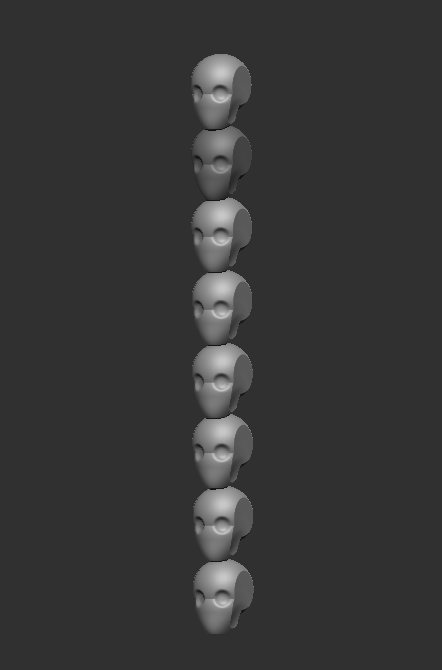
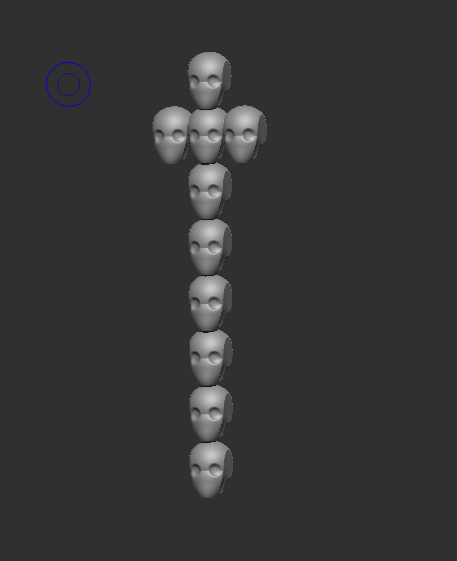
To begin with, I sliced off the sides of a sphere with the curve knife tool, after which I duplicated the mesh, cut the new shape in half and moved it down to create a jaw-like shape for the head. To make sure my proportions stayed correct through the whole modelling process I copied the head 8 times on a new sub tool and stacked them on top of each other, I could then use this as a reference for the size of body parts.
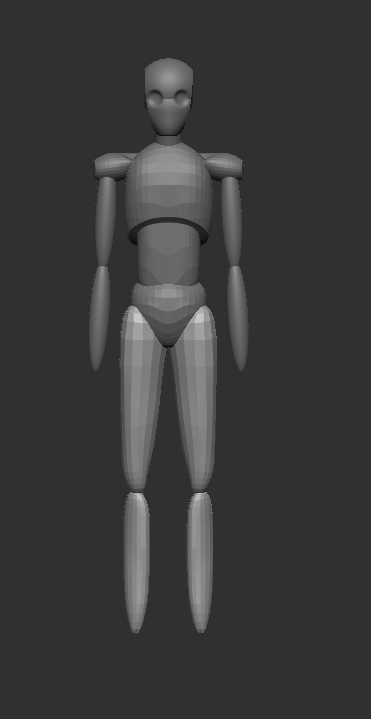
I used the same technique of appending, transposing and moving the shapes as I did in my first attempt but I noticed I was much faster this time, this could be due to ensuring the individual shapes were at an even lower poly-count than before, using my proportion reference I was able to construct a basic block out of my character.
I appended and moved some new shapes to act as basic muscle formations, I intended on also blocking out these muscles and defining some shapes on the body before merging the sub tools this time, as it would give me more control over the resulting body.
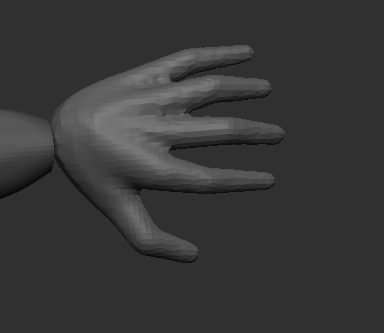
Another thing I did differently than in my first attempt was the hand block out, rather than using cuboids like in the canvas tutorials I decided to try using Zspheres. Using my own hand as a reference I arranged the Zspheres with one for the palm, then three for each finger, forming the joints and finger tips.
Sculpting
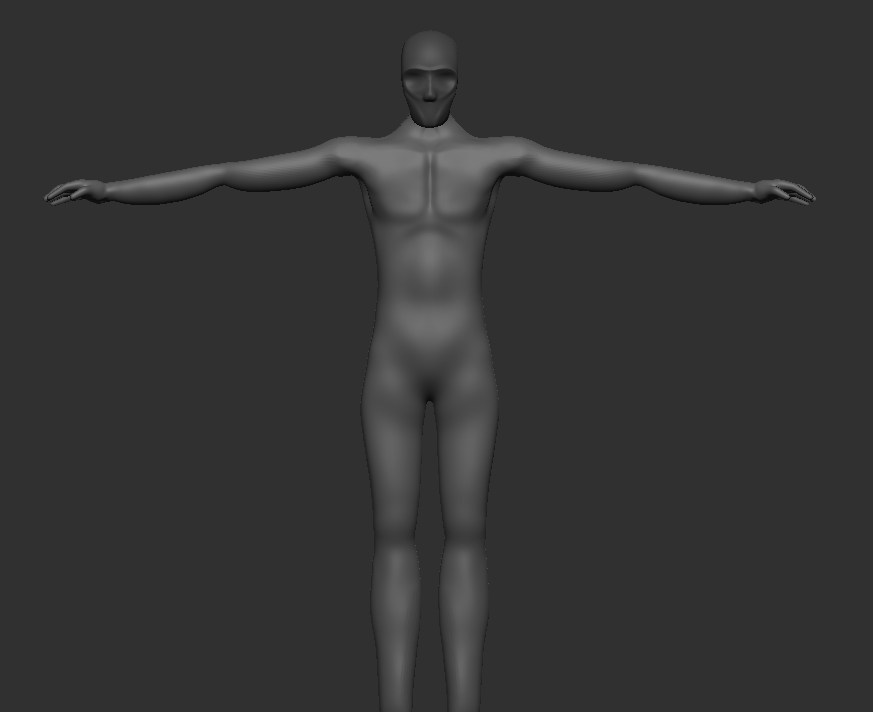

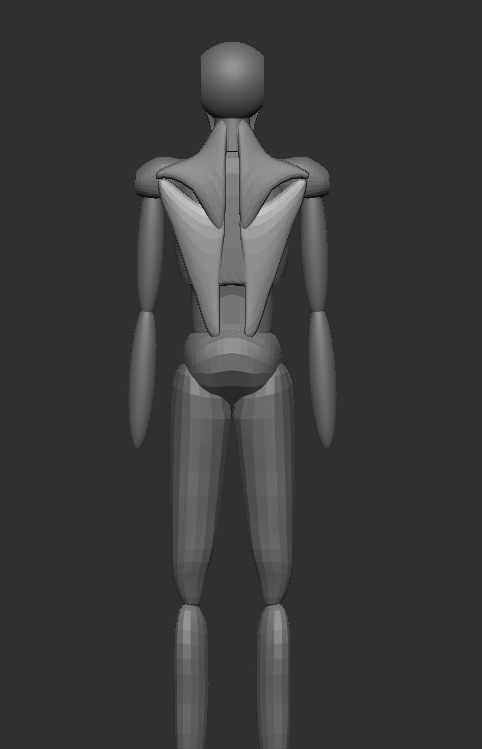
Once I was happy with the look of the block out, I once again merged the sub tools together and used Dynamesh to regenerate the topology. I was really happy with the result of this and thought it was already much better than my first attempt. There were a few unnatural shapes or holes so I went back in with the clay build up brush (BCB) to fill them in and fix the geometry in those areas. After that I used the dam standard brush (BDS) to insert a few more defined edges, the brush is usually subtractive which means it cuts into the mesh with a harsh angle but by holding the Alt key the mode of the brush is inverted so I could add geometry with it instead. I used the polish brush (BHP) to ensure a flat smoothing of some areas
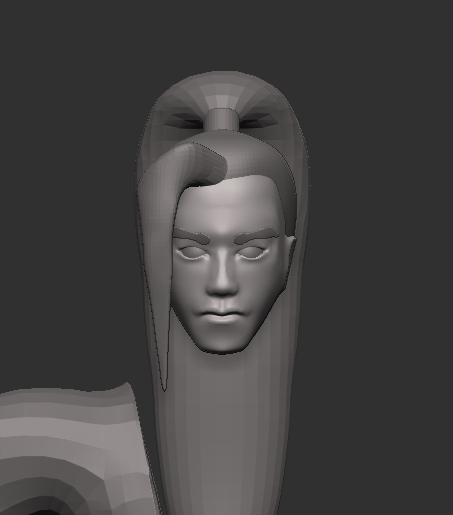
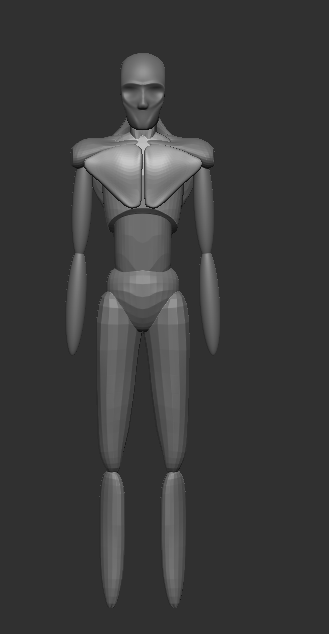
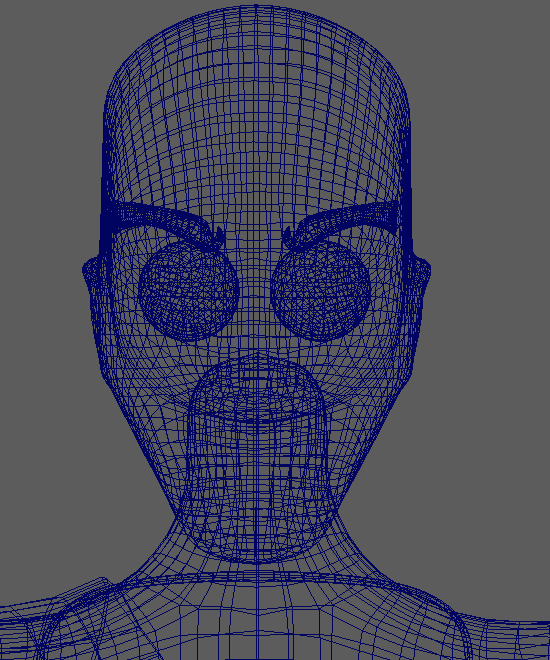
I built up the face using the same combinations of brushes, first defining the main shape with the move tool, adding to and refining those shapes with the clay build up, smoothing everything out then adding the final layer of detail with the dam standard brush and the polish brushes. I inserted a new sub tool for the eyes and mirrored it, which was useful as it let me wrap both the eye lids around the shape of the eyes.
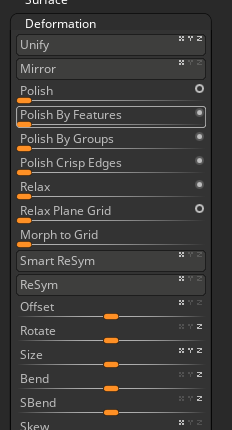
I masked a rough eyebrow shape then extracted it to form the eye brows of the character, however the mask was extraction was quite rough so I used the ‘polish by features’ function under the deformation tab to smooth out the edges of the eye brows so they were easier to work with.
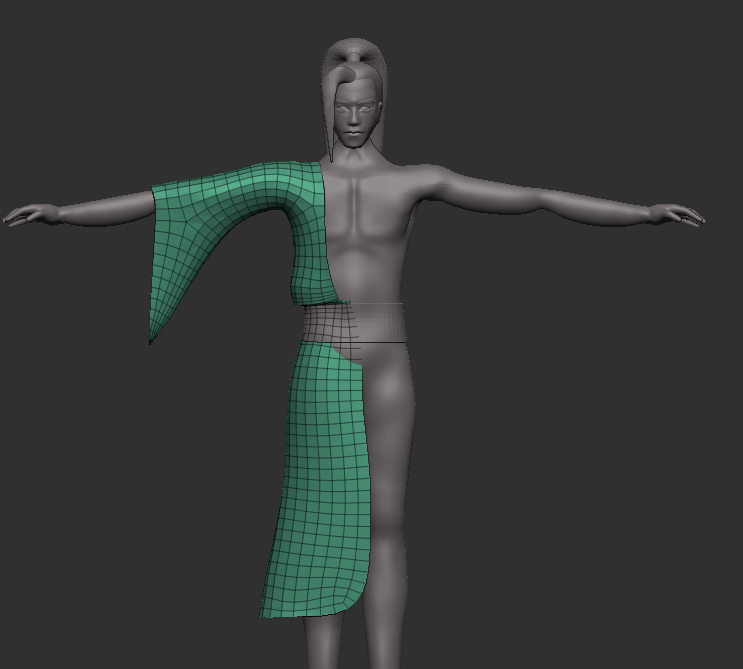
This time whilst extracting shapes for the clothes I made sure to delete the back faces of the mesh first, I did this by selecting the front facing poly group with Ctrl Shift and selecting ‘Delete hidden’ under the geometry tab. This left me with a single sided mesh which I applied dynamic subdivision to, this wasn’t to subdivide the mesh but rather to add a thickness to it which I could apply after I was happy with the shape of the clothes, something I learned from a SavannahXYZ (2022) short on sculpting thin cloth.
I continued blocking these shapes out, always making sure to Dynamesh before the topology got too stretched. I was able to effectively block out all parts of my character’s clothing like this.
I took another try at sculpting more detail into the cloth, like folds and creases. To do this I used the standard brush (BST) as well as the dam standard brush to build up layered folds into the geometry. I was happy with how this turned out but wasn’t sure it would fit the aesthetic I was going for, I decided to keep it for now.
Final Tweaks
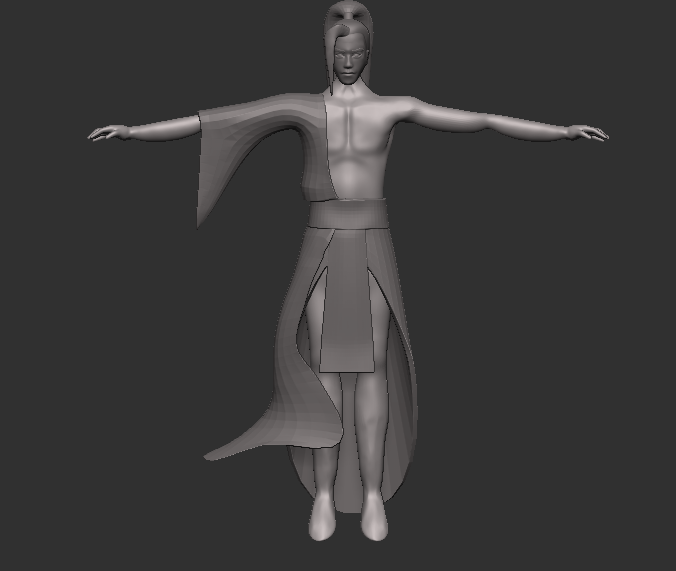
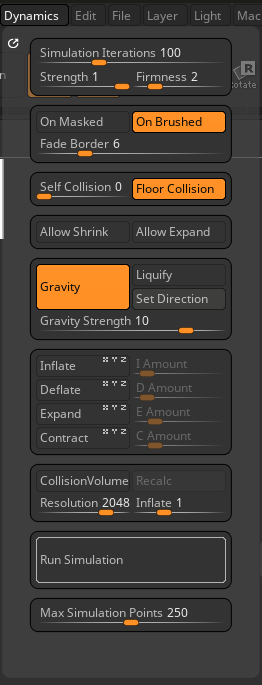
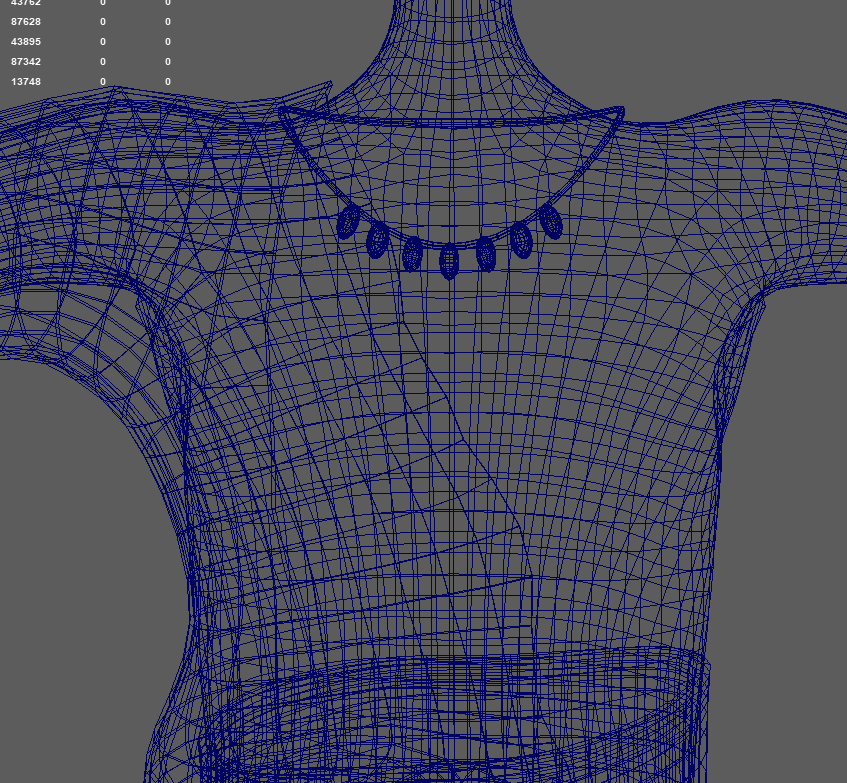
I applied some poly painting to my character to get a vague idea of how he’d look after texturing, and then added some small accessories like the necklace, bracelets and the hair-tie, this was done by adding in rings and other primitive shapes and arranging them on the body. I had a bit of trouble making the necklace look natural so I used the Dynamics tab to run a simulation and let it fall into place.

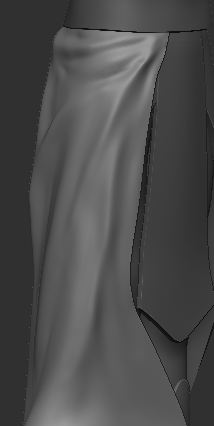
I changed the colour of the lower skirt to match the main piece of clothing after receiving some feedback on it, I definitely preferred it this way however I still felt it was a little off and I was beginning to really dislike the folds on the robe so I undid the sculpting. I split the robe into a top and bottom part so I had more control over their individual shapes. I then stretched out the bottom piece and mirrored it across to the other side, cleaning up the geometry on the bottom with the curve knife tool.
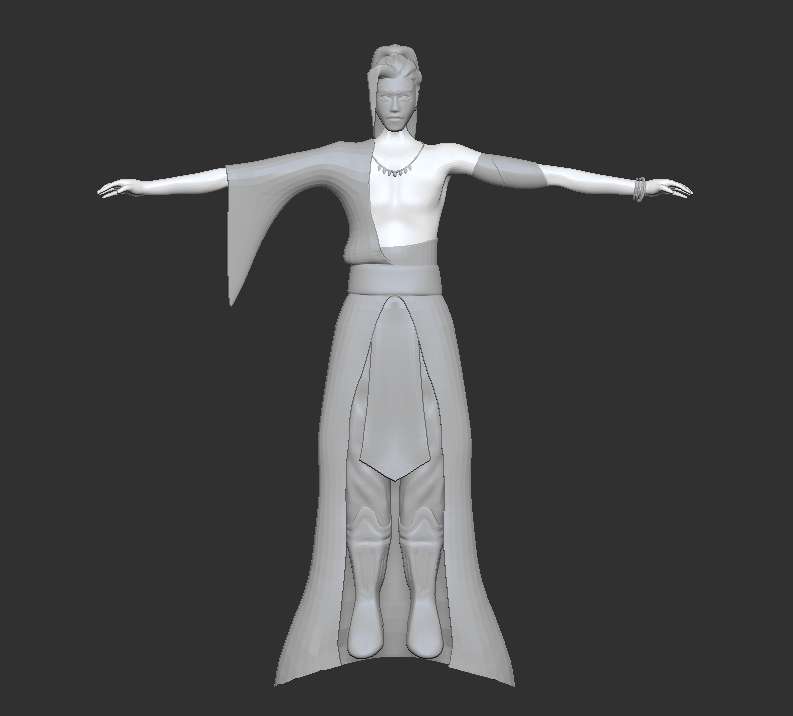
I extracted some more shapes, making sure to keep the mesh single-sided and cleaning up the edges using the deformation tab. These were mainly used to split up areas of low visual complexity, I didn’t want too many flat areas so I added some bandages or cloth wraps around the character’s bicep and waist.
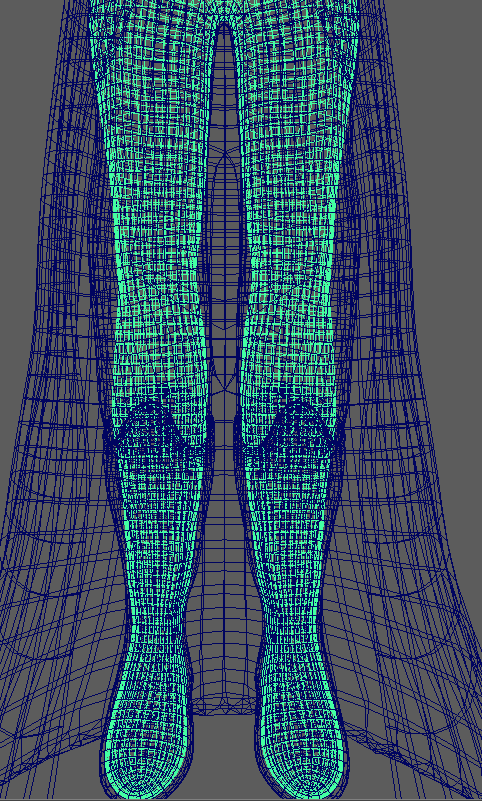
I cleaned up some Rougher areas of the mesh with the move brush set to a really low radius and organised the topology into different poly groups by masking parts and creating a new poly group with Ctrl W, I did this to make the UV process a lot easier later on. I used ZRemesher to regenerate topology and keep the separate polygroups, I then imported the character into maya after which I manually retopologised some areas and fixed some geometry.

By the end of this process my polycount had gone down from around 120K to 66K, whilst that is still a rather high number of polygons I think that may be mostly due to the clothes of my character being double sided.
UV Mapping


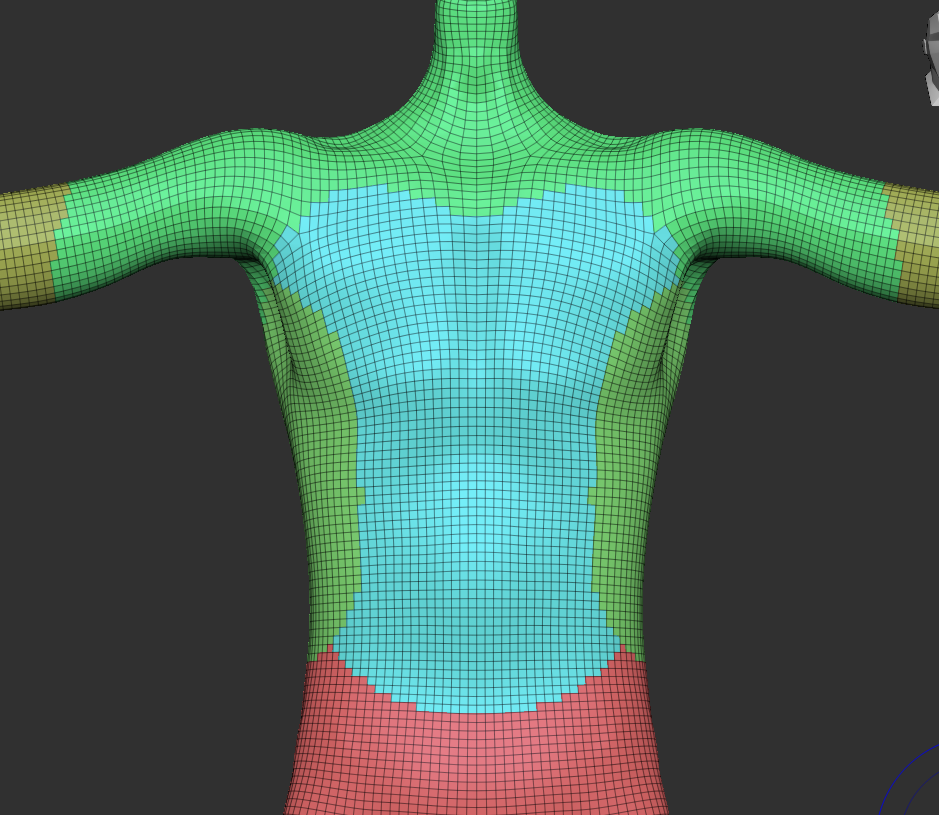
I then moved onto UV mapping my character. To do this I used the Cut and Sew tool within maya to place seams along my mesh, this allowed me to unwrap those areas as flat UV maps to apply textures onto. I had to make sure that my UVs weren’t too stretched or compressed, which would show up as a red and blue colour in the UV editor. This was because distorted UVs could cause problems while texturing the character.
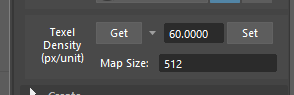
Another thing I had to make sure of was setting a consistent texel density across all of the UV maps
Texturing
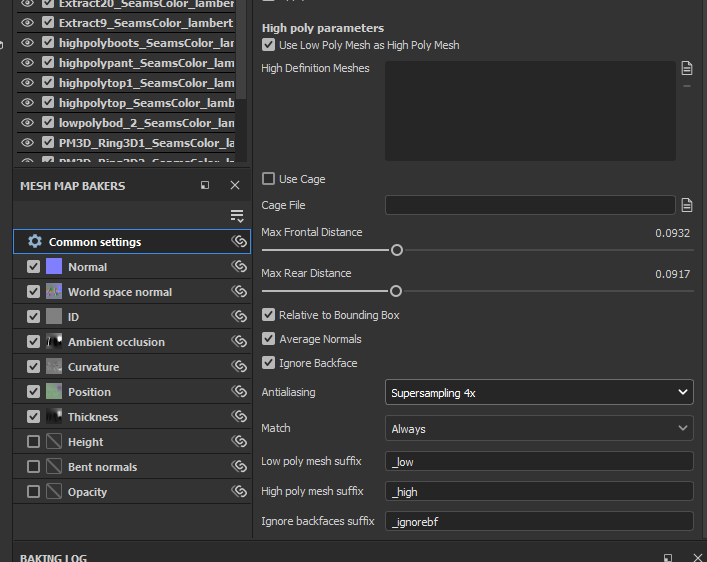
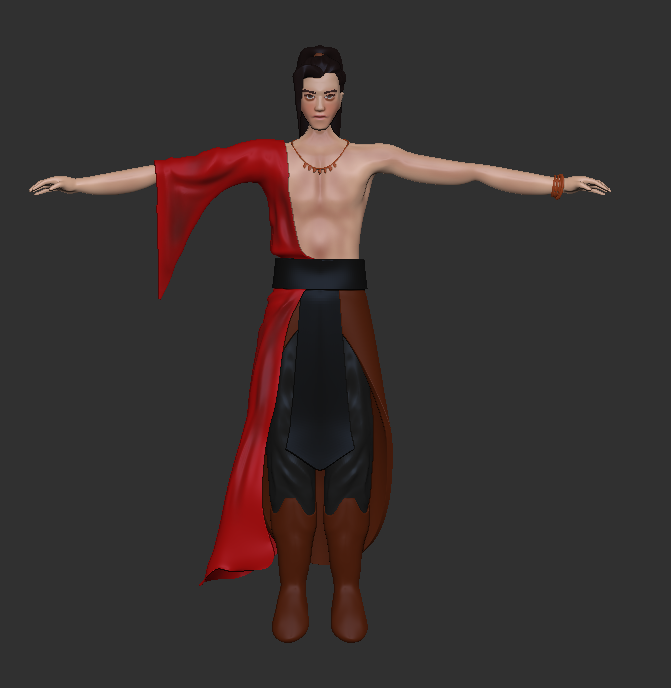
Before I went onto texture my model I baked the high poly mesh onto the low poly mesh inside substance painted, this transferred the detail from my high poly mesh to my lower poly mesh whilst keeping the optimal lower poly count.
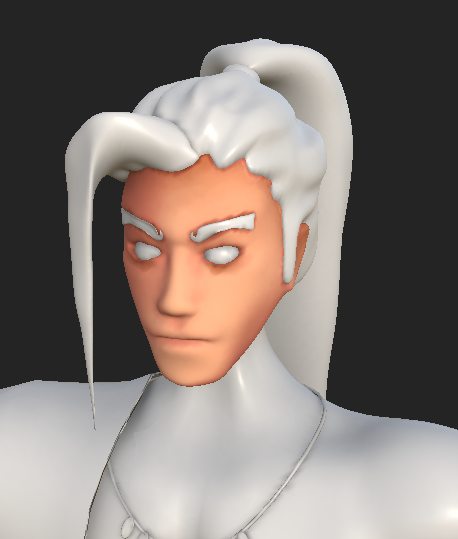

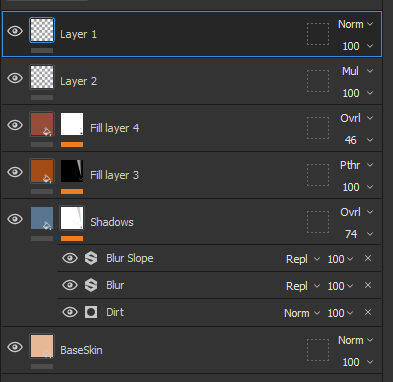
For the skin I followed a video by Abe Leal (2023) to create a semi-procedural texture using different base colour fill layers, each one with a different mask to affect a different area, for example I created the base shadow layer by applying a dirt generator as a mask. It’s important to always use a form of blending between the layers, which in this case was the blur and blur slope, otherwise you would end up with very jarring transitions between the colours. I then hand painted some details onto the face and created a fill layer above every other one which had only a roughness value, which I set to 1. This was roughly the process I used for most of the layers like the hair, trousers, boots and bandages.

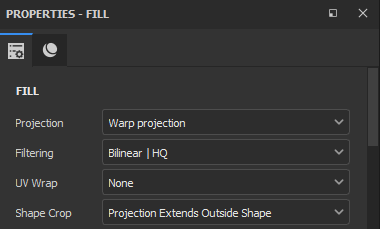
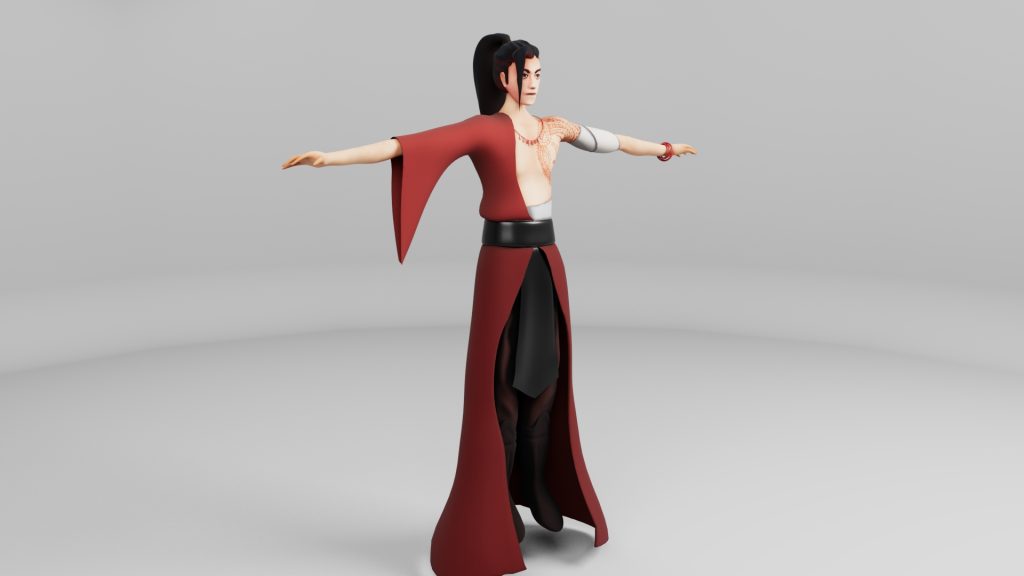
To finish off the texturing I found a Phoenix texture online and wrapped it around the upper chest and shoulder of my model. I did this by importing the image as a texture brush into substance painter and setting the projection type to ‘Warp’
Rendering
Link to youtube upload: https://youtu.be/3E6ZMUKLGm8

Reflection
Considering this was my first time sculpting a character in any 3D software I am really happy with the result, I think I managed to convey my character concept to a personally satisfactory standard. I have become much more confident in my 3D sculpting abilities since starting this module and I believe I made quite a lot of progress.
I believe that starting with the practice attempt then moving onto the second one really helped me build and establish a more efficient workflow, I noticed a big difference in the time it would take me to do something at the start of the project than when I did those things towards the end, such as adding new sub tools, transposing them and moving them into a desired place.
There are quite a few ways I think I could still optimise and improve this character. One of those would be to further optimise the mesh, by getting rid of the inner layer of the clothes, and not have overlapping geometry where the layer underneath wouldn’t be visible anyways. This is something I’ll have to keep in mind for future projects if I intend on optimising them into game-ready states.
Whilst I did not want to add deformation to the robe of the character, if I had more time I would have looked into hand painting texture and detail. I briefly researched this in previous projects and in my own experience substance painter is a lot more suited to procedural materials and textures rather than hand painting onto a model however I could have tried to find an alternative software to use after the substance painting process.
I could have also spent more time on modelling more interesting and detailed accessories for my character, expanding on the jewellery he is wearing as well as giving him the glaive weapon.
Finally I tried a few different ways of posing the character after finishing the sculpting and retopology, such as importing the character into Mixamo* or using the Transpose Master function in Zbrush, however I was having trouble with the mesh of my character being really distorted when trying to pose it. I could fix this by making some adjustments to the spacing between body parts as well as adding in a weight painting system to try limit the distortion on the clothes. Unfortunately I ran out of time to do this.
References
Mood board images:
BNHA (2022) Blade Empress Digital Illustration Available online: https://www.pinterest.co.uk/pin/39899146689623418/ [Accessed 27/10/2023]
daviddennie (2019) China Phoenix Fenghuang Digital Illustration Available online :https://www.pinterest.co.uk/pin/china-phoenix-fenghuang-illustration-png-free-download-in-2023–306526318403005144/ [Accessed 27/10/2023]
EriSol (2022) Digital Illustration Available online: https://thehanfustory.com/collections/sui-tang-dynasties/products/hezi-qun-addison [Accessed 27/10/2023]
KH_CT (2023) China Phoenix Fenghuang Digital Illustration Available online: https://www.pinterest.co.uk/pin/o-n-anime-xiv–291889619613793196/ [Accessed 27/10/2023]
VangHen (2022) Forgotten Fenghuang Digital Illustration Available online: https://www.hoyolab.com/article/6194665 [Accessed 27/10/2023]
Xích Diễm Cố Tích (2018) Digital Illustration Available online: https://www.pinterest.co.uk/pin/3659243438723660/ [Accessed 27/10/2023]
_naa.03 (2023) Digital Illustration Available online: https://www.pinterest.co.uk/pin/15973773672277694/ [Accessed 27/10/2023]
Media referenced:
Abe Leal (2023) Stylized Textures Tutorial | Hand-Painted Style in Substance Painter Available online: https://www.youtube.com/watch?v=cT5PJKMPTdg&t=1612s [Accessed 8/12/2023]
Riot Games (2009) League of Legends Available online: https://www.youtube.com/shorts/rwTHR0umNpg
SavannahXYZ (2022) How to sculpt cloth painlessly in Zbrush! Available online :https://www.youtube.com/shorts/rwTHR0umNpg [Accessed 17/11/2023]
Software used:
Adobe (1990) Photoshop Available online: https://www.adobe.com/uk/products/photoshop/
Adobe (2007) Substance 3D Painter Available online: https://www.adobe.com/products/substance3d-painter.html
Autodesk (1998) Maya Available online: https://www.autodesk.co.uk/products/maya/overview?
Pixologic (1999) Zbrush Available online: https://www.maxon.net/en/zbrush?gad_source=1&gclid=Cj0KCQiAwbitBhDIARIsABfFYII-frJ0qzs0_Fbnx1FduYzLzmYbvAf9gtPHOTsl6iZt5_Coc4WQJCoaAspFEALw_wcB